Linux 环境驯服 NS3 的记录
写在前面
经过笔者的一番斗智斗勇,最后总结下来的一些经验就是,在跑 ns-3.1x 版本时,最主要的兼容性问题就是编译器的版本问题,推荐和官方文档一样,仅下载最基本的依赖项,笔者最终敲定的版本是 gcc 5.4.0 和 Python 2.7.12 ,也是 Ubuntu 16.04 的包管理器的默认版本。如果你使用更高版本的 Linux 系统,请务必注意 gcc 的版本问题。
另外,官方以及大部分开源项目均直接在 Linux 上直接运行,按他们的直接来大概率不会有什么环境问题,大可以不像楼主从这个 Windows 版本的项目折腾回 Linux 。
原目标是跑通一个运行 DCQCN 协议的 NS3 仿真项目。见 ns3-rdma 。
虽然 README 中指出了直接通过 Visual Studio 2015 即可一键运行(项目中有 .sln 工程文件),但是出于使用习惯,还是决定在 Linux 上跑。
不过显然没有那么一帆风顺,按照作者的说法确实需要改一下 waf 文件,但是我在配置和编译的过程中,报错属实接连不断,修了一个又出现第二个,而且有些报错甚至时隐时现,由于还没仔细研究过 waf 的有关内容,修起来也不是非常得心应手,而且报错感觉上似乎是该项目的依赖环境和代码似乎不太匹配,有些库或有些函数在高版本似乎被替换或移除了(虽然依赖也是仓库中原封不动克隆过来的,不懂,既然原作者能构建,理论上来说也不需要额外替换依赖版本)。
总之,在倒腾半天后,决定从 NS3 的源码开始搞了,毕竟原作者在 README 中已经标明了他替换的文件,那从头来应该是可行的。(希望如此,这篇文章是变搞边写的)
驯服过程
1. 环境
| 配置项 | 参数 |
|---|---|
| 操作系统 | Windows 11 24H2 |
| WSL 版本 | 2.6.0.0 |
| 内核版本 | 6.6.87.2-1 |
| Linux 版本 | Ubuntu 16.04 |
| NS3 版本 | ns-3.16 |
注:
- 希望 WSL2 不要搞我;
- 选择 ns-3.16 是因为在前期的测试过程中发现 DCQCN 项目的部分函数或库似乎还是老版本的写法,所以尝试回退(原项目是 ns-3.18);
- 采用 Ubuntu 16.04 是因为已经在 Ubuntu 20.04 上失败一次了,主要原因是 gcc 的版本太新;
2. NS3 的安装与编译
本步骤参照官方文档进行。
- 安装依赖:
1 | |
我是直接用 Docker 环境的,不然电脑环境要爆炸了,可以参考我的 Dockerfile :
1 | |
- 安装 NS-3.16 源码:
1 | |
- 解压并进入源码目录:
1 | |
- 配置,检查依赖:
1 | |
- 编译源码:
1 | |
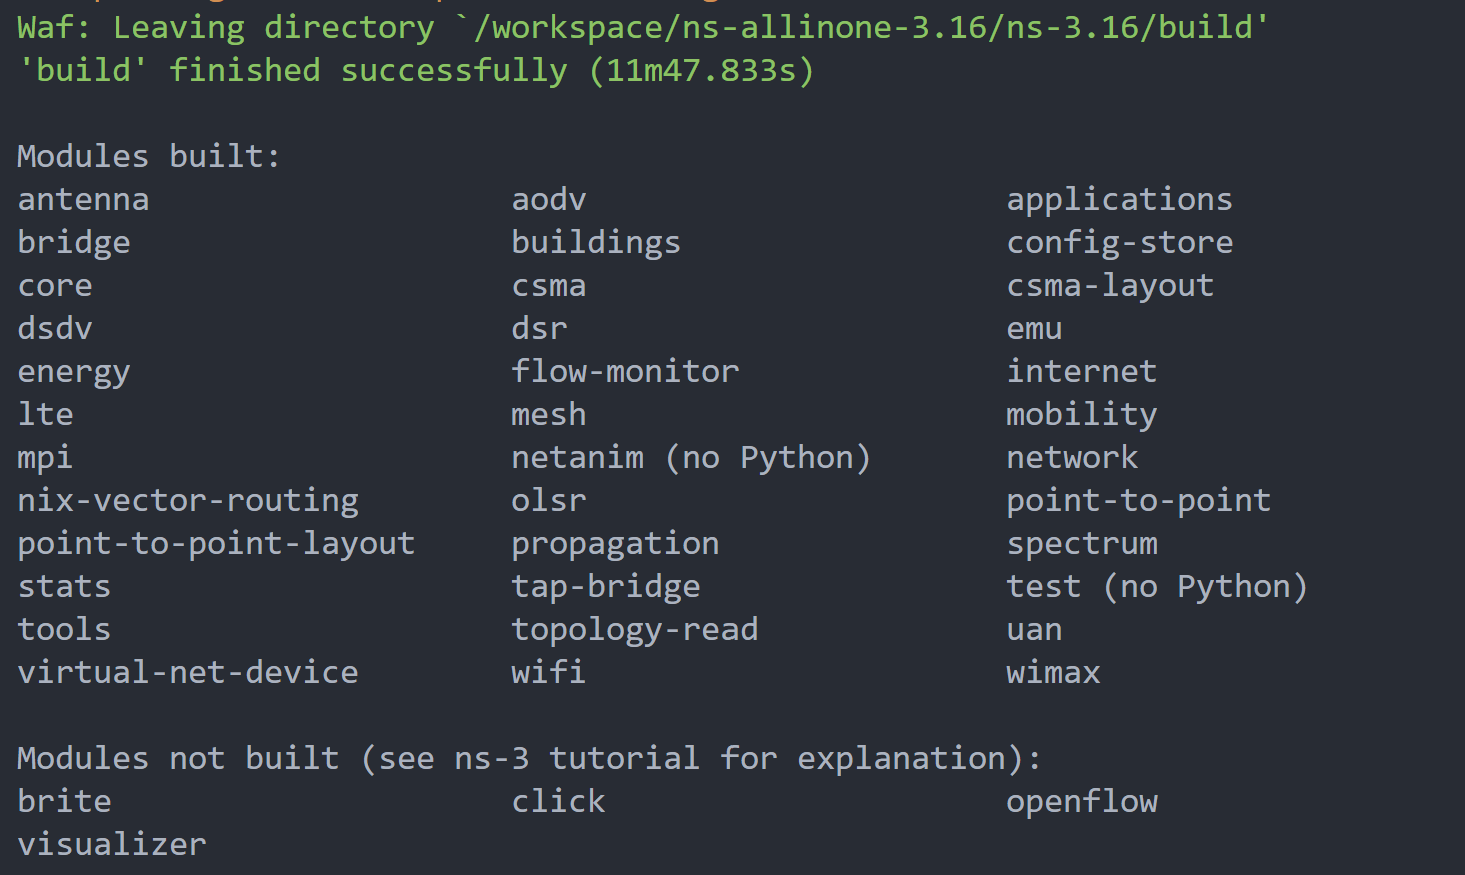
可以看到有一些模块没有构建,参考官方文档是因为需要添加一些额外的依赖,此处先跳过了,之后再来补充。编译一次的时间太长了。
- 运行示例程序进行测试:
1 | |
如果观察到以下输出,那大问题应该是没有了。

3. 移植 DCQCN 代码
关于修改的部分,原作者是这么说的:
point-to-point/model/qbb-net-device.cc and all other qbb-* files:
DCQCN and PFC implementation. It also includes go-back-to-N and go-back-to-0 that handle packet drop due to corruption.
In 2013, we got a very basic NS-3 PFC implementation somewhere, and developed based on it. We cannot find the original repository anymore.
network/model/broadcom-node.cc and .h:
This implements a Broadcom ASIC switch model, which is mostly doing all kinds of buffer threshold-related operations. These include deciding whether PFC should be triggered, ECN should be marked, buffer is too full so packets should be dropped, etc. It supports both static and dynamic thresholds for PFC.
Disclaim: this module is purely based on authors’ personal understanding of Broadcom ASIC. It does not reflect any official confirmation from either Microsoft or Broadcom.
network/utils/broadcom-egress-queue.cc and .h:
This is the actual MMU buffering packets. It also includes switch scheduler, i.e., when upper layer ask for a packet to send, it will decide which queue to be dequeued. Strategies like strict priority and round robin are supported.
applications/model/udp-echo-client.cc:
We implement the RDMA client here, which aligns with the fact that RoCEv2 includes UDP header. In particular, original UDP client has troubles when PFC pause the link. Original UDP client keeps sending packets at line rate, soon it builds up huge queue and memory runs out. Here we throttle the sending rate if it gets pushed back by PFC.
internet/model/seq-ts-header.cc and .h:
We didn’t implement the full InfiniBand header. Instead, what we really need is just the sequence number (for detecting corruption drops, and also help us understand the throughput) and timestamp (required by TIMELY.) This is where we encode this information into packets.
main/third.cc:
The main() function.
There may be other edits here and there, especially the trace generation is scattered among various network stacks. But above are the major ones.
改动主要包括:
- NS3 的 point-to-point 和 network 等模块代码;
- main 中的
third.cc,这应该是 DCQCN 的仿真主程序;
修改步骤
我采用的替换过程是比较大刀阔斧的。
- 替换 NS3 的源码文件夹;
直接将 NS3 源码文件夹 workspace/ns-allinone-3.16/ns-3.16/src 替换为 DCQCN 项目的源码文件夹 ns3-rdma/src 。
如果你直接用 Git 管理工作区,那你可以直接通过工作树快速查看 DCQCN 做了哪些修改:
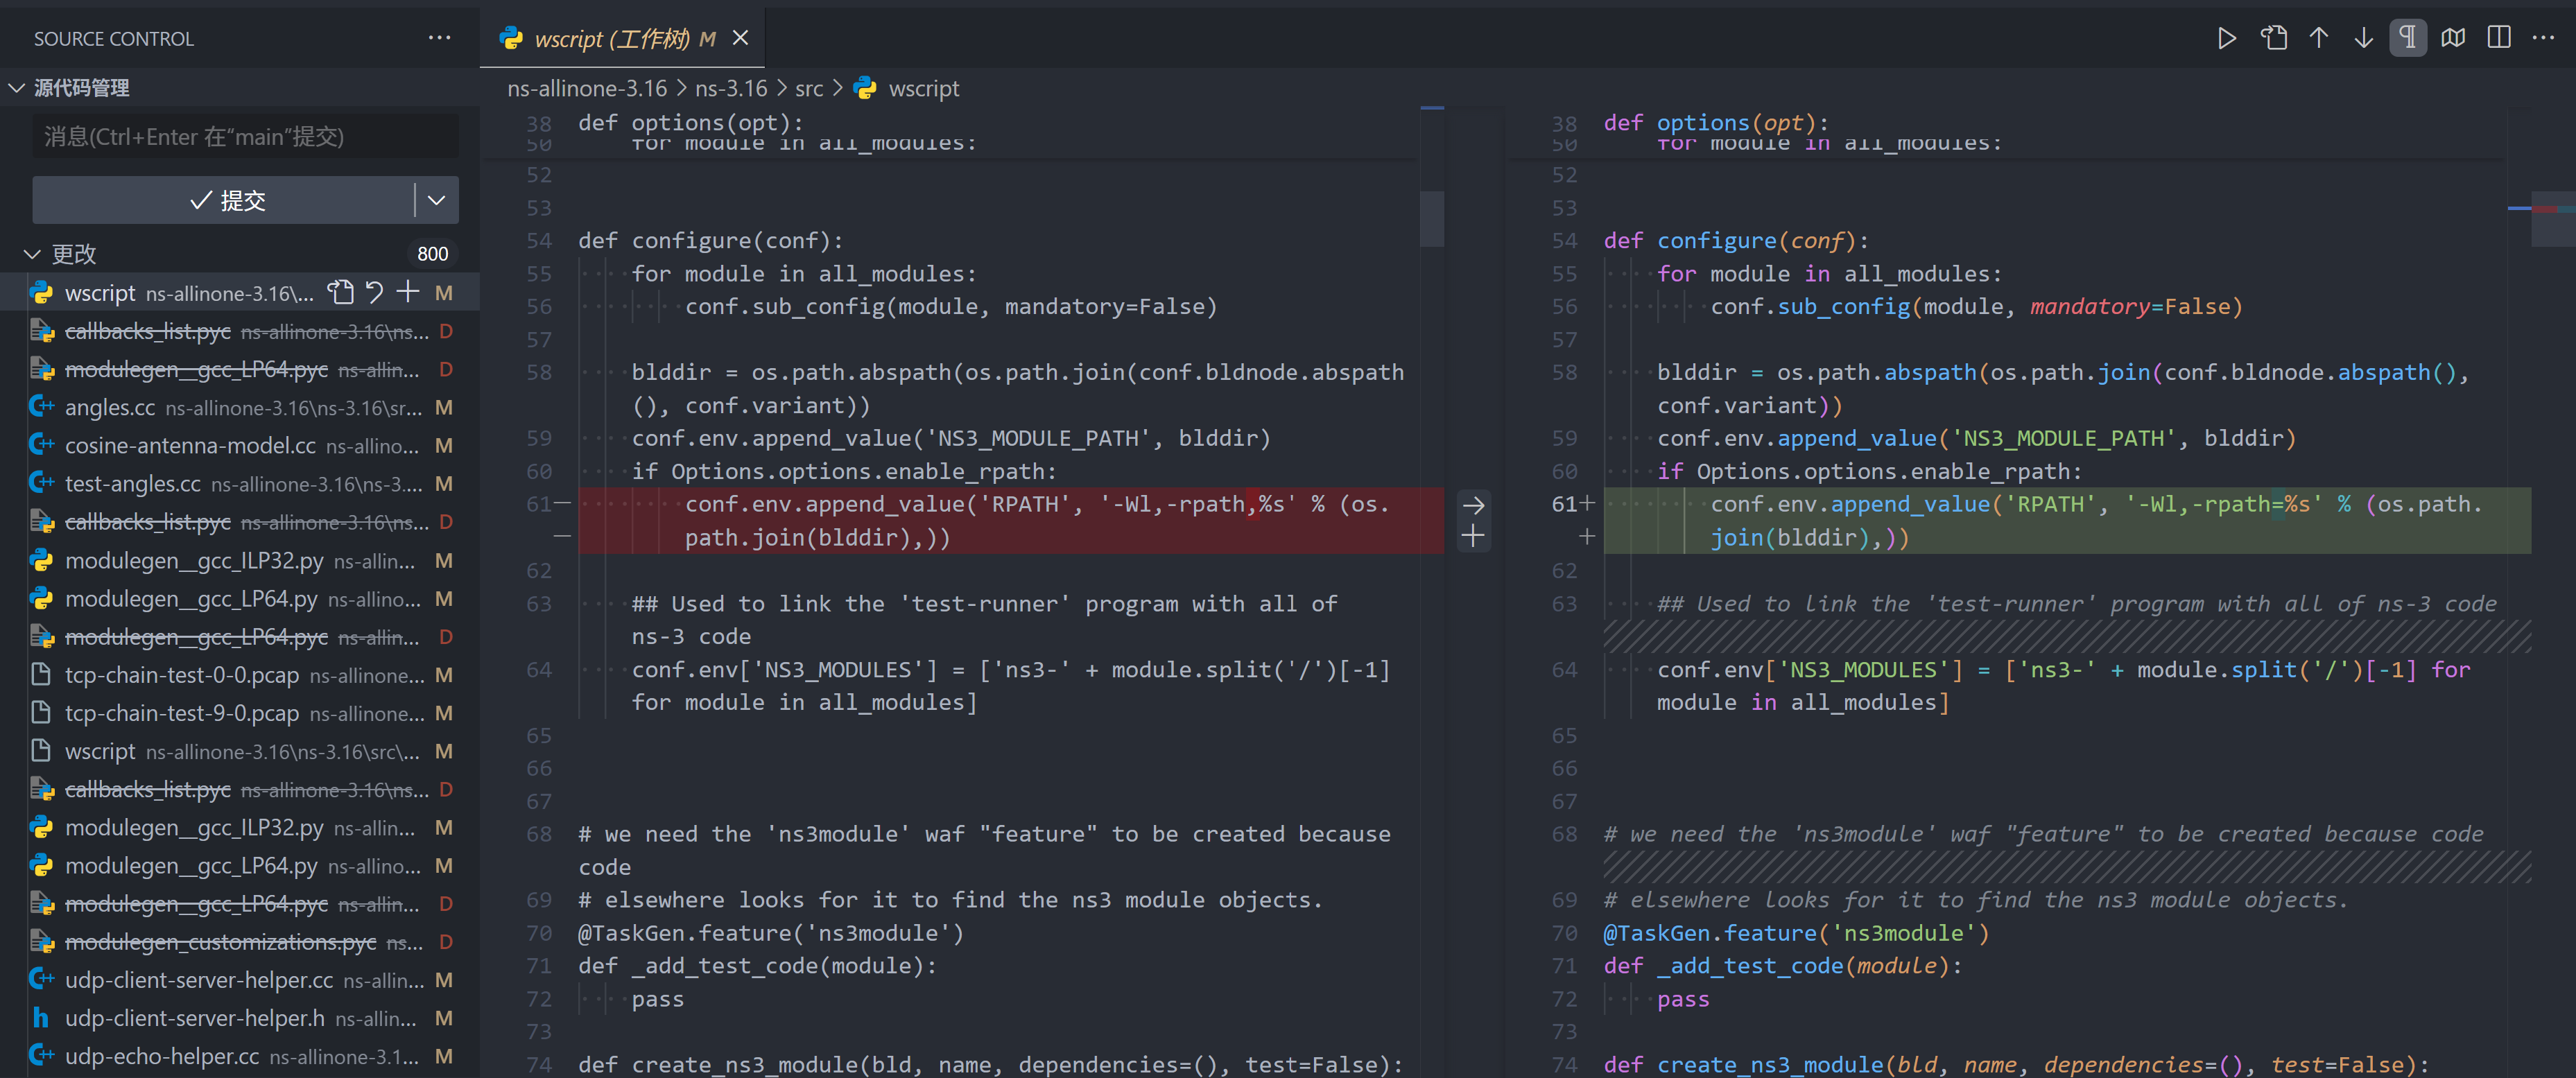
.pyc 不用管,这是 Python 编译过程中生成的文件。修改的文件主要是增加一些库或者修饰符和语法问题,未跟踪的部分应该就是 DCQCN 的实现了。
不过仔细观察一下新增的文件,主要在 core、internet、lte、network、point-to-point 这几个模块下。每个模块都有对应的 wscript ,应该需要修改对应模块的 build 函数。
- 添加新增的文件链接到编译函数中;
core 模块下新增了 hash-fnv、hash-function、hash-murmur3 和 hash 4 组代码文件和对应头文件。将 workspace/ns-allinone-3.16/ns-3.16/src/core/wscript 添加如下内容:
1 | |
internet 、lte 、network 、point-to-point 模块中的 wscript 作者已经添加了(不知道为什么 core 模块没添加)。
- 替换仿真主程序;
ns3 源代码的示例程序位于 workspace/ns-allinone-3.16/ns-3.16/examples 下,这部分文件默认不会参与编译,需要启用参数 --enable-examples 进行编译,我们直接将 DCQCN 的仿真程序放到 workspace/ns-allinone-3.16/ns-3.16/scratch 下,这样默认参与编译,并且不需要额外编译一些用不到的示例程序。
将 DCQCN 项目仿真主程序 ns3-rdma/examples/tutorial/third.cc 文件放置到 workspace/ns-allinone-3.16/ns-3.16/scratch/ 目录下,为便于区分也可以改个名。
编译过程
- 先清除一下之前编译的内容:
1 | |
- 然后重新配置并编译:
1 | |
4. 运行 DCQCN 仿真
- 迁移仿真配置文件:
将原项目的 ns3-rdma/windows/ns-3-dev/x64/Release/mix 文件夹复制到 workspace/ns-allinone-3.16/ns-3.16/mix 下。
- 重新链接动态库:
将 build 目录设置为默认的动态库路径。
1 | |
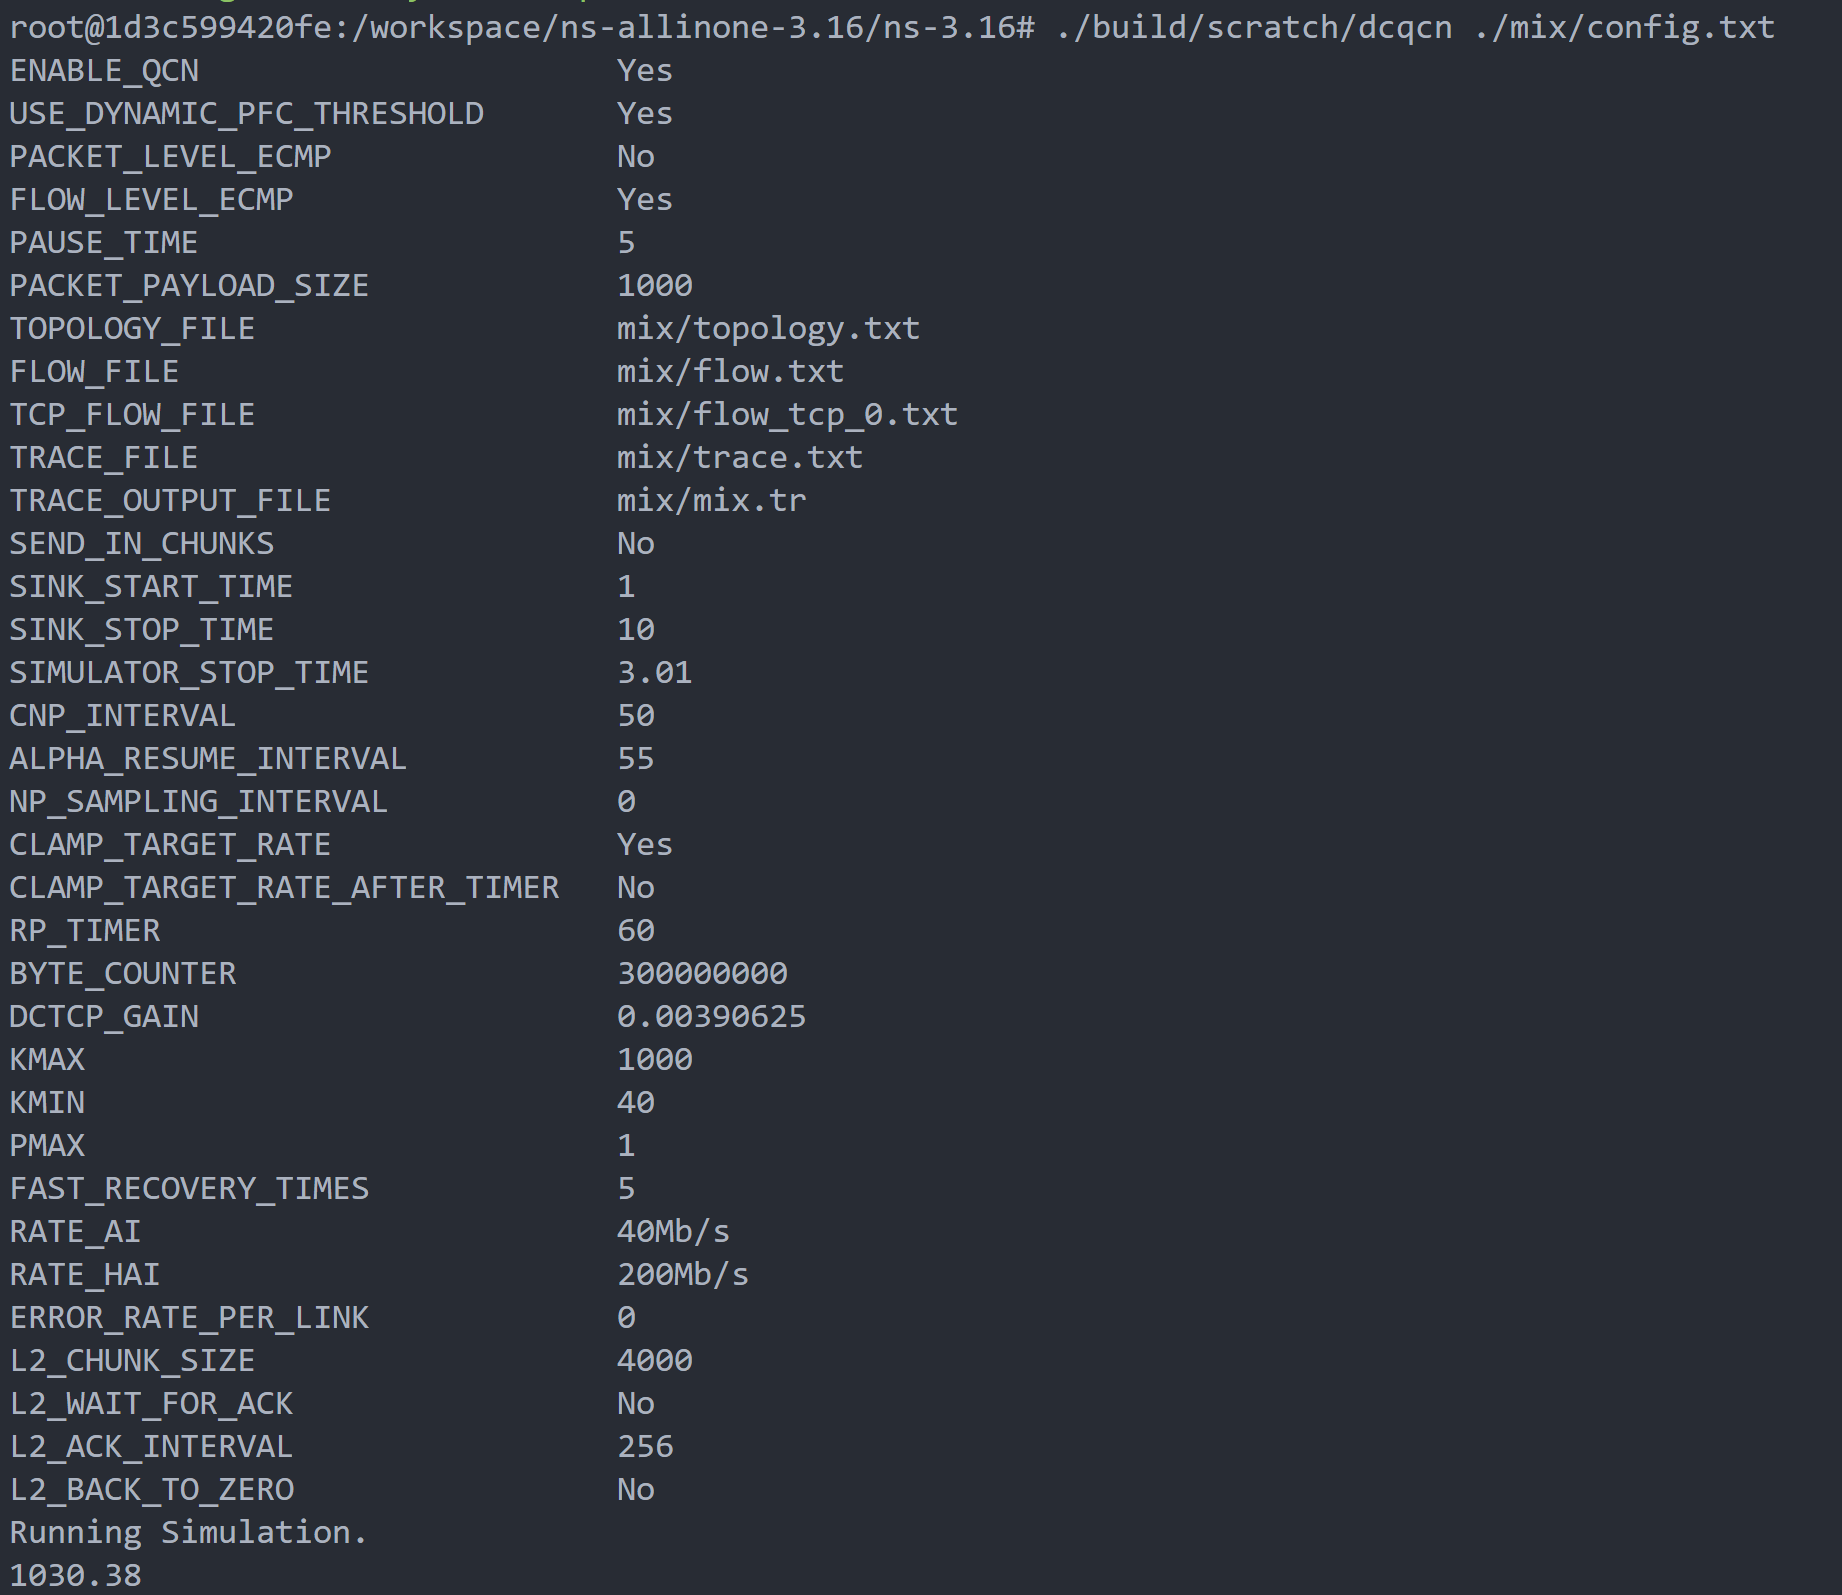
- 运行仿真程序:
运行仿真程序编译生成的可执行程序,我这里是 ./build/scratch/dcqcn ,并指定配置文件参数 ./mix/config.txt 。
1 | |
等待仿真运行一段时间。
5. 问题汇总
5.1 直接替换 src 文件夹,编译时发现多出 Bindings 文件夹并报错?
如果你和笔者一样,大刀阔斧的替换了整个 src 文件夹,在编译阶段,你可能会报如下错误:
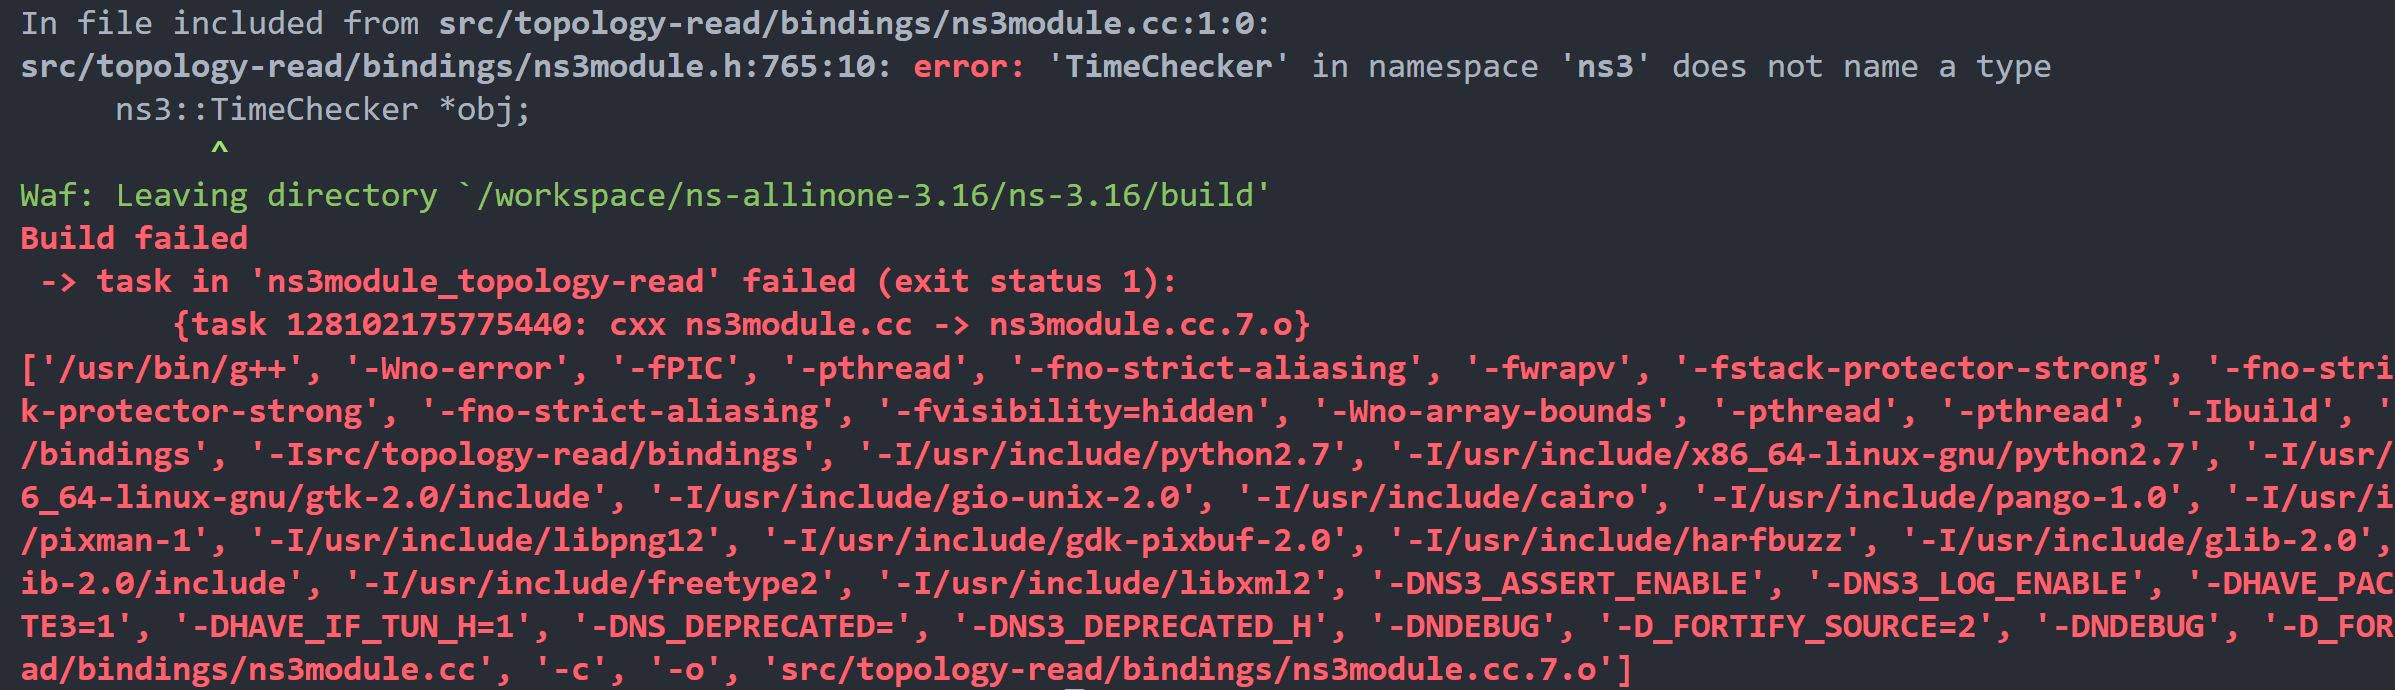
与正常的编译过程比较可以发现,编译阶段涉及的文件变多了,多的部分主要是各个模块的 bindings 文件。
一种快速的解决方式是直接禁用 Python bindings:
1 | |
这将完全跳过 bindings/python/ 中的构建。或者手动清理对应模块中不需要的 bindings 目录也是可行的。